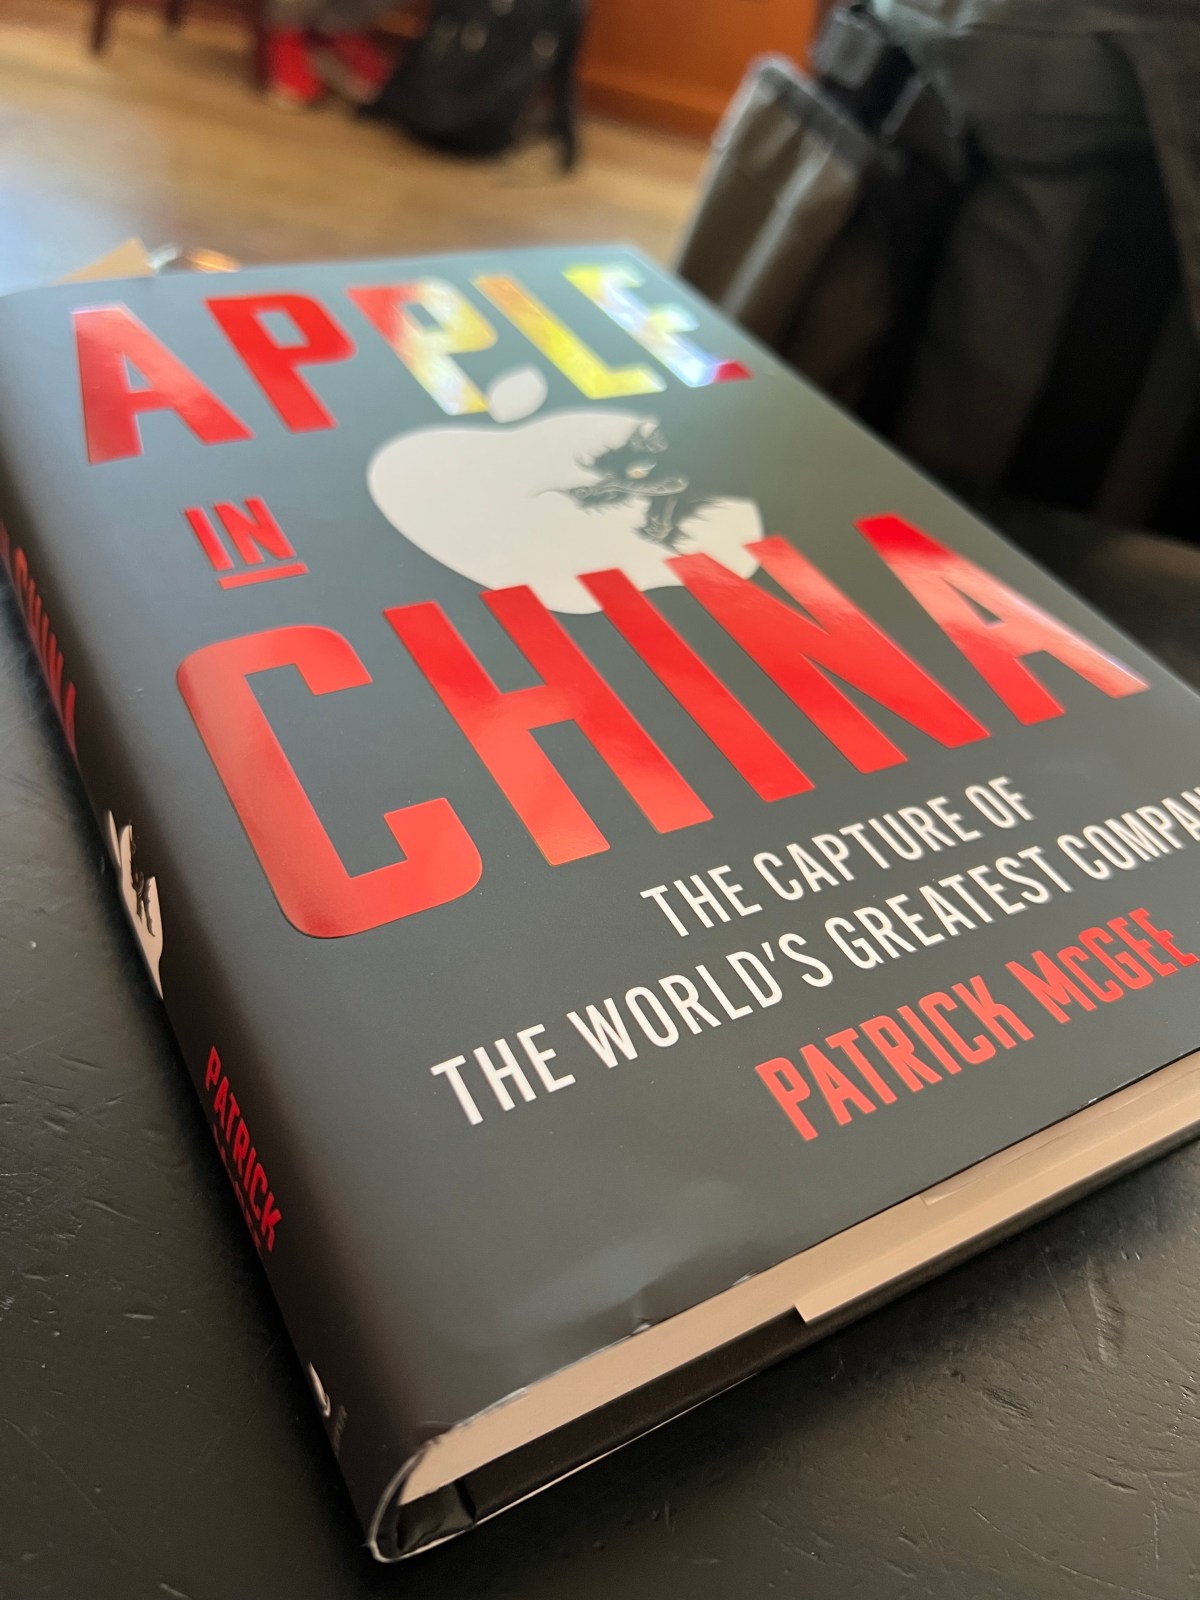
I ride up to Capital Hill and check out Elliot Bay Books. I find the book I’m looking for, “Apple in China: The Capture of The World’s Greatest Company” and have a sit down at book store coffee shop, Oddfellows, for a read and drink. Upon purchasing a delightful Arnold Palmer I take a seat and dive right into one of the chapters. It’s the section on Navy Seals, not the real Navy Seals mind you, but a group of security folks that ended up dubbed the Navy Seals. But I digress, after reading a while I purchased the book, tossed it in my backpack and back upon my steed I rode. After the drop back into downtown Seattle I went over to Union and boarded the next Sound Transit 550 Express.
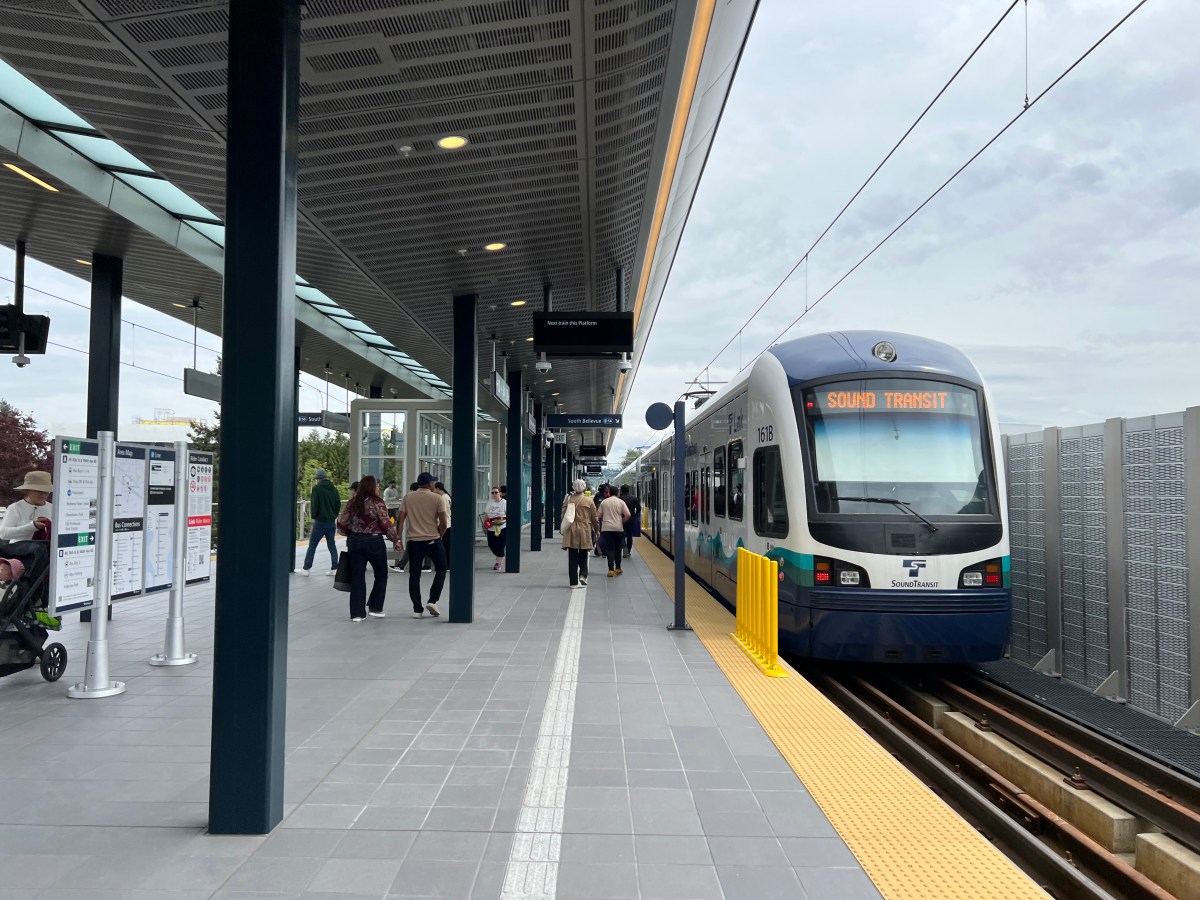
That’s where the stupid started. Upon arriving at the South Bellevue Station to transfer to the Link Light Rail, I realized the train was off. As in, there was no applied power. I had just took the elevator up to the platform, but the train power seemed to be off. I stook patiently by the train waiting, and listening to the driver’s radio chatter. It sounded like the power had just been restored. Great, I thought!
So I boarded. The AC kicked on, but the train had been there long enough without power in this 80+ degree day that it was hot inside. As the train sat there the driver exited his driver’s cabin (cockpit?) and tried over and over again to fix the front right door. It seemed to be stuck in a state of being closed but in alarm. The normally blue lights of the door shown red, and he worked on it and worked on it. Opening the bay overhead and fiddling and fiddling.
Finally, off we went with the door, theoretically, fixed. Arriving at the very next station however things went sideways again. The door opened, but then upon closing went into an alarm state again. After attempting to shut the doors several times, the driver again existed the driver’s cabin and started fiddling with the door again. The interesting thing, was the lights went green this time instead of red when the door was in alarm. The other oddball thing was, the train wouldn’t depart.
Yay Seattle issues! We’ve gold plated things at ludicrous prices yet still get these ridiculous toothing problems. I’ll give em’ this, at least on the east side the line is relatively new, so these kinds of things happen. But hot damn it’s rather ridiculous.
After a few more attempts and another half dozen Sound Transit employees and Sound Transit security showing up they fiddled and fiddle with it and eventually it shut, the lights went blue, and off we went.
Finally, after almost 8 minutes, we arrived in Bellevue. For the record, it usually takes about 2-3 minutes to get from South Bellevue to downtown Bellevue.
But whatever, it’s a nice day and things were going well otherwise. I got to read a book, enjoyed a nice drink, and rode my bike around the city. A solid day plus a significant number of code contributions for the day too.
As for the book mentioned above that I purchased, it’s a must read if you want to get a solid grasp of the magnitude of how much the west basically sold off to develop China (and hats off to China for benefiting off that) with the misleading idea that China would become more focused on freedom, liberty, individual rights, and opening up to the world. Even though the book is about Apple, the correlations to what Apple has done tightly correlates to what transit and transportation organizations and companies have done for and in China. But I digress, more on all that later!
Today marks about the ~20th or so day I’ve ridden the light rail from Redmond to South Bellevue, and then transferred to the Sound Transit Express 550 from there to downtown.
My commute priority has always been about functional use versus speed or other criteria. When I write functional use, what I mean is can I use the commute for something besides just wasting away rotting like one might do in a cage (i.e. a car). Even when I have used a car in the past, the focus still remained exactly that.
Simply put, I despise the idea I follow the modern American tradition of plopping myself into a car, that I’ve worked a job to buy, to sit in traffic – often stop and go or just stopped – to go to a job that I work to do shit like buy a car. I prefer my job funds go to strategic and tactical things like living life. Travel, exploration, games, beer, good food, racing cars, bikes, more bikes, and other entertaining and enriching things vs. buying a car, maintaining a car, paying rent, and all that rat race bullshit.
So now that I’ve written this, I hope to be back soon on a regular basis writing on this blog. If for any other reason, because I enjoy it. But also to document my commuting adventures and related things. Hopefully I’ll conjure up the energy to also start putting videos together again, ya know like this one, this, or this.
Back to the Link Light Rail
With the opening of the Redmond Station, the commute – even in spite of it being 2 parts still – has dramatically improved. Largely because I can take a significant part of the trip via light rail. That means listening to music, getting some code written, videos watched, maybe edited, AI’s vibe coding, views observed, maybe a snack, some AI models processed, or simply enjoying my coffee while en route to the office.
Sometimes, shockingly, I’ll even meet someone and we’ll have a good solid kick ass conversation while en route! But why am I riding the light rail these days?
How Did I Get Here?
Ok, somewhat dreadfully, based on the Seattle area leadership’s inability to deliver on much of anything promised, the Ballard Link Light Rail didn’t look like it was ever going to happen in my life time (i.e. the next ~20-40 years at least). The house I lived in also wasn’t cutting it, so family deemed a new house was in order and we began to search a few years back.
It was hard going. Forget money even, which is it’s own problem with housing these days, houses just weren’t available. Not with the basic – for us – that put a house into qualifying. The characteristics of the house we wanted, in order of importance;
being on a trail(s) or dedicated bike infrastructure
being near park(s) and woodland space
being away from any primary interstate or highway arterial (preferable to stay away from carcinogens)
being near transit options to get into and out of Seattle downtown
being near transit options to get to King St Station and SEATAC and/or other airport with area departure options.
being away from any primary roadway arterial
being most quiet
being walkable (i.e. do sidewalks exist, do business exist?)
being low crime (honestly, only sort of important in certain ways)
minimum number of rooms for remote/home work in addition to kiddo space
no HOA cuz forget that shortsighted self-fascistic nonsense
MAGAt density is no more than 1 out of 10 (super easy in this area, since low crime areas have very low MAGAt density) **
minimum ~1600 square feet
enough land to use for a victory garden (i.e. something like ~200 sq ft minimum, more is better)
Redmond? What? Not intuitive!
Naturally we assumed we could only really get something that would have maybe ~3-5 of these items, and then maybe part of another 5-10. We searched and searched and searched and finally, after offers put in, offers turned down, we finally expanded our search outside of Seattle to some east side locations and landed an offer in Redmond. Somewhat shockingly it has a multitude of these things in full and all of them to a partial degree.
The only things Redmond, outside of its downtown core fails on is a few things;
Walkability to do anything useful outside of Redmond’s downtown core is questionable and often requires other modal options to complete. However, that said, almost everywhere in Redmond has sidewalks, clear paths, and ways to get places, it just might take 15-45 minutes depending on where one lives.
Transit options are spectacular if you are in the downtown core. However leaving the downtown core it becomes immediately questionable whether you will have good transit options.
The light rail, as this post is about, massively changes the dynamic into and out of Redmond, Bellevue, and in about a year – theoretically – into Seattle for the east side. Even without the bridge into Seattle being open, it’s still changed the dynamic of the east side in a very positive way.
Even though we’re away from primary arterials and highways, interstates, and the like. The roadway system is setup in an auto-focused way that leads people to some expediently stupid behaviors. Negligence and obliviousness – as you might expect – reign supreme with east side drivers. The majority do endeavor to be polite and all but people generally just suck at driving. So YMMV in your automotive driver interactions.
With that being the baseline we have ended up over here in Redmond. So far it’s actually pretty sweet, more so than I thought when we first made the decision and landed the house. Simply put, we live a very European style life over here in Redmond and recently I’ve started commuting to a downtown Seattle office.
Back to The Topic At Hand: Link Light Rail Line 2
My commute now ends up being an interesting and enjoyable string of modal options.
1st – To get to the Link station, I come down from the Redmond hills via bike. There I roll into the now open station, swipe my Orca Card, bump the elevator button and up I go to board the Link.
2nd – Upon boarding the Link I rack the bike. Extremely easy to do since this is the originating station and I generally board a train that has few people on it at its start. Then off we zip toward the – current – other end of the line in South Bellevue. During this segment of the trip I take a seat and out comes the laptop. As mentioned earlier in the post the code, videos, editing, or other activities ensue. After the short trip as we leave the stop just before South Bellevue I slip the laptop back into my pack, and unrack the bike for departure. Upon an elevator ride down, I roll over to wait for the arrival of the Seattle bound Sound Transit Express 550.
3rd – The bus fills the current gap while they wrap up construction work on the I-90. The 550 serves the purpose well, and it isn’t overly packed. This puts me in a position to whip the laptop back out and spend a little more time getting shit done, reading, or whatever I may. Upon arrival in downtown I alight the bus, unrack my bike, and then begin the last short segment to the office.
4th – I then enjoy this last segment riding Spacey to the office. It’s always a smooth, seamless, trip around and along various roads and bike infra in downtown. I tend to change up the route just a bit every time I take the trip.
That’s it. That’s my commute these days, and hot damn it’s an enjoyable one! This time of year especially as the weather gets nice and I’m a quick roll – amidst the hilarious insanity of the car oriented commute – to breweries, the epic Seattle waterfront, and other places to chill before the trip home.
More adventures, thoughts, and interludes of written words in the coming days and weeks. Hope your commute rocks, or if you don’t, that you’ve got an enjoyable day to day. Cheers!
** MAGA specifically. Not a fan of confused fascists. I realize this does not include general Republicans or conservatives, especially of the Reagan, Eisenhower, or even Lincoln variety. Since obviously, none of those Presidents were fascists, maybe shitty, but not wannabe fascists.
I wrote about some pedantic details in the last post here. Check that for some nuggets and the current situation logistically. But read on for some observations from opening day!
I wrote a thread on Mastadon, Threads, and Blue Sky too. Click through to check em’ out.
Thread Summary – Redmond light rail opening today: Celebrating the debut of service to Redmond Technology Station. – First southbound ride: The fresh thrill of speeding out of Bellevue, over I-405 and sprawling lots, into Redmond. – Elevated magic: The segment between Wilburton and Bellevue stations, soaring above streets in a blink—reducing a 5-10-minute slog to 45 seconds of pure “whee.” – Empty parking lots everywhere: Wild expanses of asphalt ripe for redevelopment—if the economy holds up. – Broken elevator / IYKYK: Only one failing escalator on the 2 Line over at Wilburton. That’s a seemingly good ratio for Sound Transit and escalators. – Bike corral buzz: Cascadia Bikes’ racks overflowing—major props to everyone who pedaled in.
Rolling into Redmond Technology Station for the First Time There’s nothing quite like that first southbound trip into Redmond Technology Station. After waiting months for what I personally will now find the most useful segment of light rail in the area. It seems the wait has taken eons.
The Elevated Spectacle Peek out the window as you depart Bellevue Station: a dizzying montage of concrete and greenery. The rail track climbs, slicing through the skyline with surgical precision. Down below, cars inch along, helplessly stuck in gridlock. Up here, you’re at street level with the brids—or at least with the tops of pine trees. It’s the kind of view that makes you feel like the future might arrive in the USA yet, albeit one powered by a modest electric motor humming serenely beneath the floor.
Asphalt Oceans & Urban Dreams West of the station lies an ocean of empty parking lots—so vast you’d think Microsoft itself had spawned them all. It’s eerie, almost dystopian… until you remember the upside: raw redevelopment potential. Imagine mixed-use towers, live/work lofts, parks, eateries—an entire urban neighborhood rising from the asphalt. That is, assuming our economy doesn’t implode in the next couple of years, as that might lead to it not happening for decades upon decades. Fingers crossed, America, fingers crossed.
Two Wheels, One Corral Shout-out to Cascadia Bikes for setting up a deluxe bike corral—overflowing with riders who made the wise call to pedal in. Seriously, if you rolled up on two wheels, you’re a genius. Fresh air commute, zero parking worries, and you still get to high-five your fellow cyclists. Hats off—or helmets on—to you.
Mode-Shaming: Because Someone Has To
Biked: You’re smart.
Walked/Bus’d: Good call.
Drove: You’re a jack-ass clogging up the pedestrian friendly area of town. Why even? Don’t do that shit.
Next time, ditch the car and catch the train. Your neighbors (and everyone’s blood pressure) will thank you.
More Technical Details
The new bike routes to the stations are spectacular, check out more about them here.
You’d think after eight years of planning and broken promises we’d be cruising into downtown Redmond and gliding across I-90 into Seattle by now. Instead, we’re stuck in a never-ending limbo of concrete re-works, ribbon-cuttings, and “coming soon” bulletins. Here’s the unvarnished status on both fronts.
1. Rolling Into Redmond: Sort-of — But Not Yet Downtown
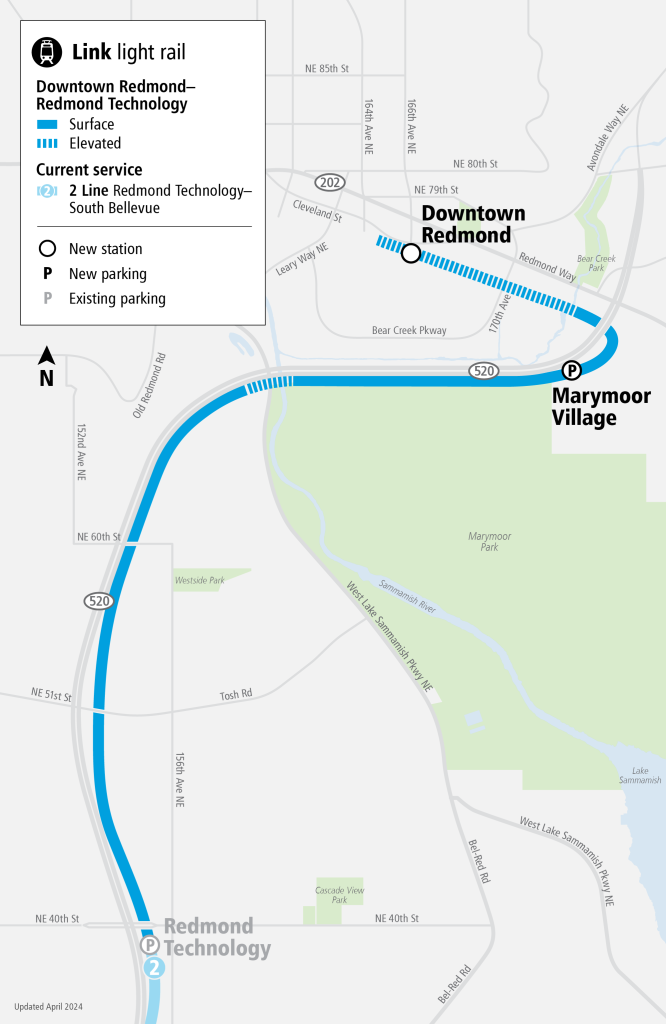
The first phase of East Link finally blasted into Redmond Technology Station on April 27, 2024, hauling in a whopping 35,000 riders on day one. That stretch—running between South Bellevue and the Overlake Transit Center site—proved we can build tracks and run trains when we really want to.
But if you live, work, or play in downtown Redmond, you’re still stranded on the bus. The Downtown Redmond Link Extension adds two stations—Marymoor Village (just south of Marymoor Park) and Downtown Redmond (in the retail/core area)—but they won’t swing open until Saturday, May 10, 2025. Expect a 10:30 a.m. ribbon cutting at the new Downtown Redmond Station, with “regular” service kicking in around noon.
Construction kicked off back in October 2019. Crews hustled through track work, systems-integration testing (including late-night “live-wire” trials last fall), and the usual quota of quality-control headaches. Despite Covid slow-downs and a concrete-truck strike pushing timelines, finishing this last half-mile of track is finally in sight—just in time for summer traffic to remind us why we needed rail in the first place.
2. Crossing the Lake: East Link Over I-90 — Still Tethered to Shore
Meanwhile, on the western end of East Link, the segment that actually gets you from Seattle to Bellevue (via Judkins Park and Mercer Island) has been inching along even slower. The bones of the project—10 miles of track, floating-bridge foundations, and two new stations—were supposed to open in 2023. Instead:
Live-Wire Testing: Crews energized the overhead wires on the I-90 floating bridge in October 2024, complete with test trains rumbling across the lake under cover of night.
Defective Plinths: Remember the concrete “plinths” that cracked under the rails? Fixing those ate up most of 2024. Contractors hit 80% completion on the rebuild back in the summer, but slip-ups and re-inspections kept pushing milestones into late-year.
“Late 2025” Launch Window: Officially, Sound Transit has been coy—“expected to open in 2025,” they say. Insider whispers (and Reddit threads) peg it toward the tail end of 2025, but no firm month is on the books yet.
In short, don’t pencil in a commute over I-90 on Link for your Q1 2026 budget forecast. Keep riding the 550 for now and plan on that being the option.
3. Why It Matters—and Why Many Are Still Mad
Traffic Toll: Every day we delay rail, thousands of cars clog Bellevue Way, SR 520, and 148th Ave NE. That’s wasted fuel, time, and sanity.
Economic Impact: Microsoft, Nintendo, Costco Corporate—many are planting roots on the Eastside. Reliable, frequent rail isn’t a luxury; it’s mandatory infrastructure.
Credibility Gap: Voter-approved in 2008, with dozens of delays since, Sound Transit is inching toward a 116-mile system by 2041…if we believe the current schedule.
4. The Bottom Line
Redmond Technology Station:Open since April 27, 2024.
I-90 Floating Bridge to Mercer Island & Seattle:“Late 2025”—no firm date.
Ask yourself: when “late 2025” rolls around, will we finally get the seamless, cross-lake Link service we’ve been promised for the better part of two decades? Or will there be another concrete glitch, another supply chain setback, another “new” delay? Stay tuned—just don’t hold your breath.
Riding the bus into Seattle for a day of coding via coffee shop. As always, via the 545 the seats that face inward give the stability needed to be able to type and code. However it’s still wretchedly difficult and the light rail can’t open soon enough.
On one of the turns leaving downtown Redmond, someone had used the overhead baggage areas on the bus, and a piece of luggage was about to plummet to the ground. I moved swiftly (which to others on the bus seemd like I was aggressively going after something) and pushed it back onto the luggage rack an densured it was placed correctly. It managed to wiggle around and almost fall again a few moments later because of the jarring movements of the bus, but this time someone else nearby saved it, having noticed after my rapid movements to stop it falling, was keeping an eye on it.
Meanwhile the person who put it up there hadn’t even noticed. People’s situational awareness for the loss. People are far too often a walking catastrophe and I’m amazed as many of us make it through each day that do.
As we pull into the Microsoft stop at 40th another odd occurrence. A guy with a face tattoo, which is always an immediate threat risk just walks on disregarding the driver. I’m all for people tattooing whatever the hell they want to but seriously, face tattoos point to some serious trauma and issues at this point in time. It’s not a mere “art piece” or some such, it’s an advertisement of being broken by something and trying to spite others around you.
Then we get rolling and the driver rolls up to a solid 75+ mph with the bus. A speed that is somewhat reckless on 520 and I’m not real sure how its possible with these buses. They’re not exactly setup for 75mph travel. After having already nearly thrown some passengers to the ground with his hard breaking and related driving behaviors this was concerning. It also made it even more difficult to get any work done or stay focused.
We’ve got the driver going speed crazy, tattoo threat guy skulking in the back seat, elderly folks holding their pain points from the hard braking and bumpiness, and I just want to be able to type up the rest of this post and make it to my destination. As we approach the mid-highway stops I’m fully expecting burning brakes as we go barreling into the stops.
This is, to say the least, disconcerting.
We make it into the first stop, and sure enough, one can smell the heated brake dust. IYKYK
We pull out, throttle planted in the floor with the bus – I’ll just call it twerking – from the throttle being planted. So between the two highway stops the driver manages to get up to speed again very rapidly, clearing around 65mph+. A little less shaky and sketch than 75mph but bothersome none the less. Around 50-55mph is about the top speed these bendy buses can take without becoming and utter shaky annoyance.
Anyway, as we have survived so far barreling across the 520 bridge I started to wrap this post up with a simple, “light rail can’t start soon enough, this bus ride quality sucks in comparison by a significant order of magnitude.”
But then… we blazed into the turn, we had a skip on the ramp that goes 520 to I-5 south and almost had a failure to maintain control incident. We made it though, and the driver did a superb job getting through traffic and to the first stop in downtown Seattle.
All went well and a few stops in we pulled under the Monorail as the 545 always does. I stepped off the bus and got a wiff. It was a wiff of delight and flavor I’d not smelled among the streets in a long time. You see, Seattle never really has food smells, usually other human smells which are not delightful in any way. On the better days you get the fragrance of the sea, which is nice for some folks. But today, this was different. It was seasonings and spice and everything nice. It couldn’t be though I presumed I must be dreaming or delusional or the fentanyl from some dying soul had affected me.
But no, no I was correct, after getting my chain back on I mounted my pannier on my bike and looked toward Westlake Square. Sure enough, NOLA dogs before me, I marched on immediately for some food! I strolled right up and ordered. Immediately I had to comment about NOLA and smelling andouille the moment I got of the bus being one of the most delightful entrances to Seattle in years! The proprietor and I chuckled at this fact and commenced to talk about crawfish boils, the horrors of Seattle’s food, and mitigating such things with our own home grown home cooked deliciousness.
First diversion of topic pondering!
Ok, so have you noticed Seattle has “squares” and all but they’re rarely squares? For example, Pioneer Square, but it’s a triangle within the intersection and confluence of several streets. Westlake Square, but it’s also a partial rectangle + triangle shaped park that is effectively a giant concrete and stone surfaced space in the middle of the city. Nothing real park like or square about it. There are numerous spaces like this throughout Seattle and I do get it, but we should just change the names to be more fitting.
Second diversion of topic pondering!
The violent shaking of the 545 inbound was so bad, for the first time ever, a bus had done – technically at least – damage to my bike! It had knocked the chain off of the bike because of the violent shaking! I was impressed, and would have been highly pissed, except that I could re-rail it back onto the derailer and crank easily. But it could have easily snagged or caught on something and been ripped from or damaged beyond repair. There is zero need for this type of driving, but in spite of any need, it does seem that more and more the express buses do get driven like someone is going to a fire. The recent brakes giving out (or whatever happened) on the 545 that caused it to crash into a building in downtown Seattle is a prime example of this. It’s not a good look for Sound Transit, and it’s not a good look for the drivers. It’s also not a good look for the passengers who are being thrown around like rag dolls.
But I digress, ponderings over and my NOLA Dog was ready! Absolutely delicious, if ya see those available in downtown under the tent, get ya one, they’re great!
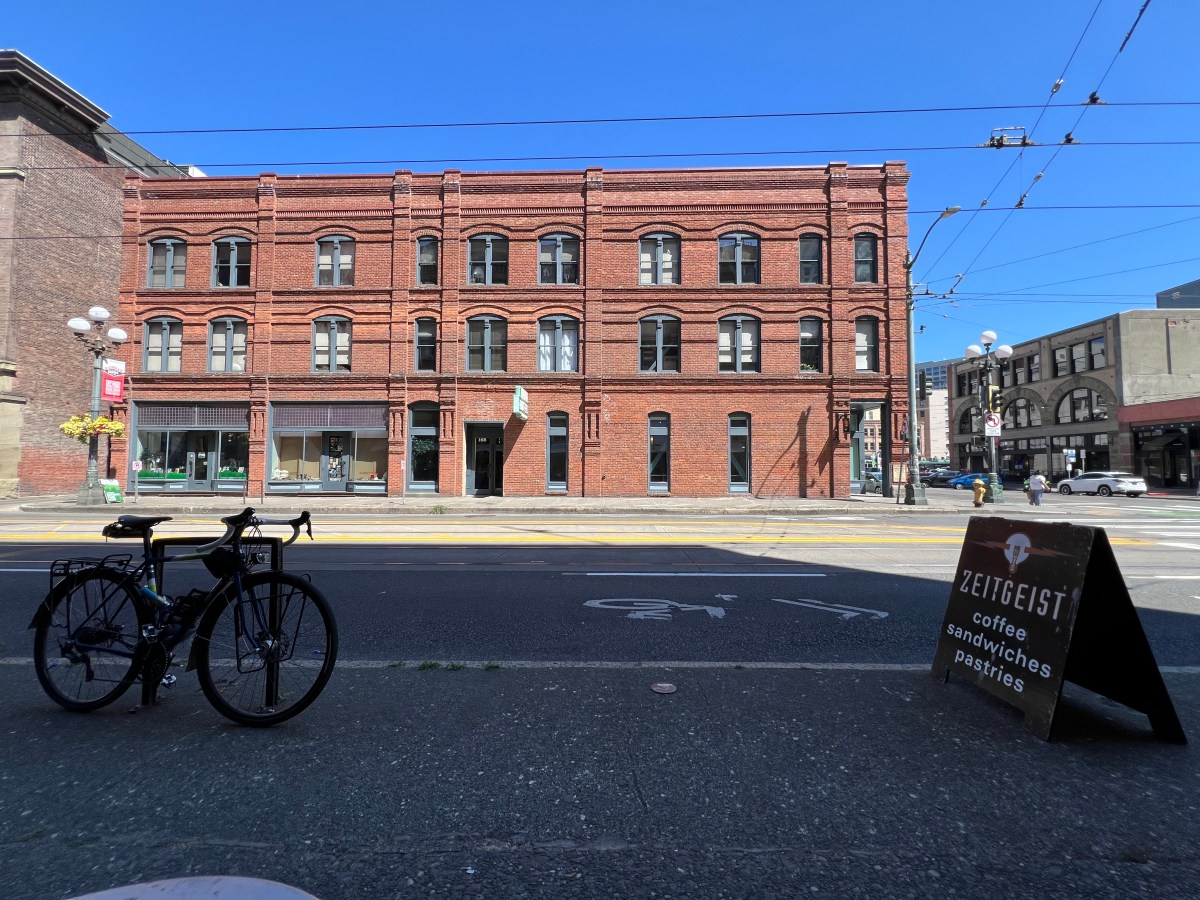
After trading details and an invite to a proper crawfish boil, I made my way down to Zeitgeist for my first bout of coding and email reading for the day. I arrived and sat outside while the line quelled itself and pondered a bit more.
After the stint at Zeitgeist I embarked on a ride from there to Starbucks Reserve shop at their HQ. I realized two things:
The HQ is parallel, perfectly parallel, heading south via the Link Light Rail. Win!
The HQ also has a kind of, almost, not sure if it is designated as such – greenway that runs perfectly in front of the HQ.
The ride from Zeitgeist by the arenas (stadiums?) and down 1st was mostly pleasant even with the industrial feel. 1st avenue, unlike the trail that runs parallel to the light rail, has no tents or heroin ODs occurring. Mostly it’s just folks going to and from the HQ plus general business. I’m sure the city has focused on this specifically to some degree, because up on 2nd or 3rd or whatever the busway is called, is just kind of nasty at points. Not dangerous, just a bit nasty. But I digress, onwards.
After the visit to Starbucks Research @ the HQ I headed down to the waterfront to check out progress on all of that. I found one things extremely hilarious, auto traffic is so bad you can just walk among or bike among the cars and beat them from point to point. If you’re driving, just avoid – entirely – the waterfront. There is zero reason to go there unless you’re driving to the ferry. But if you’re trying to go anywhere in the city, the waterfront isn’t going to speed you up by any measure.
After riding a big pseudo loop through all of that I head back toward Pioneer Square area to board a 550 bus out of the city and back toward the east side. My plan was to take the 550 and transfer at south station to the Link on the east side. That way, I could minimize bus usage.
It paid off. The bus ride on the 550 was quick, albeit kind of insane but not as ridiculous as the 545 earlier in the morning. Transferred as planned and boarded the light rail.
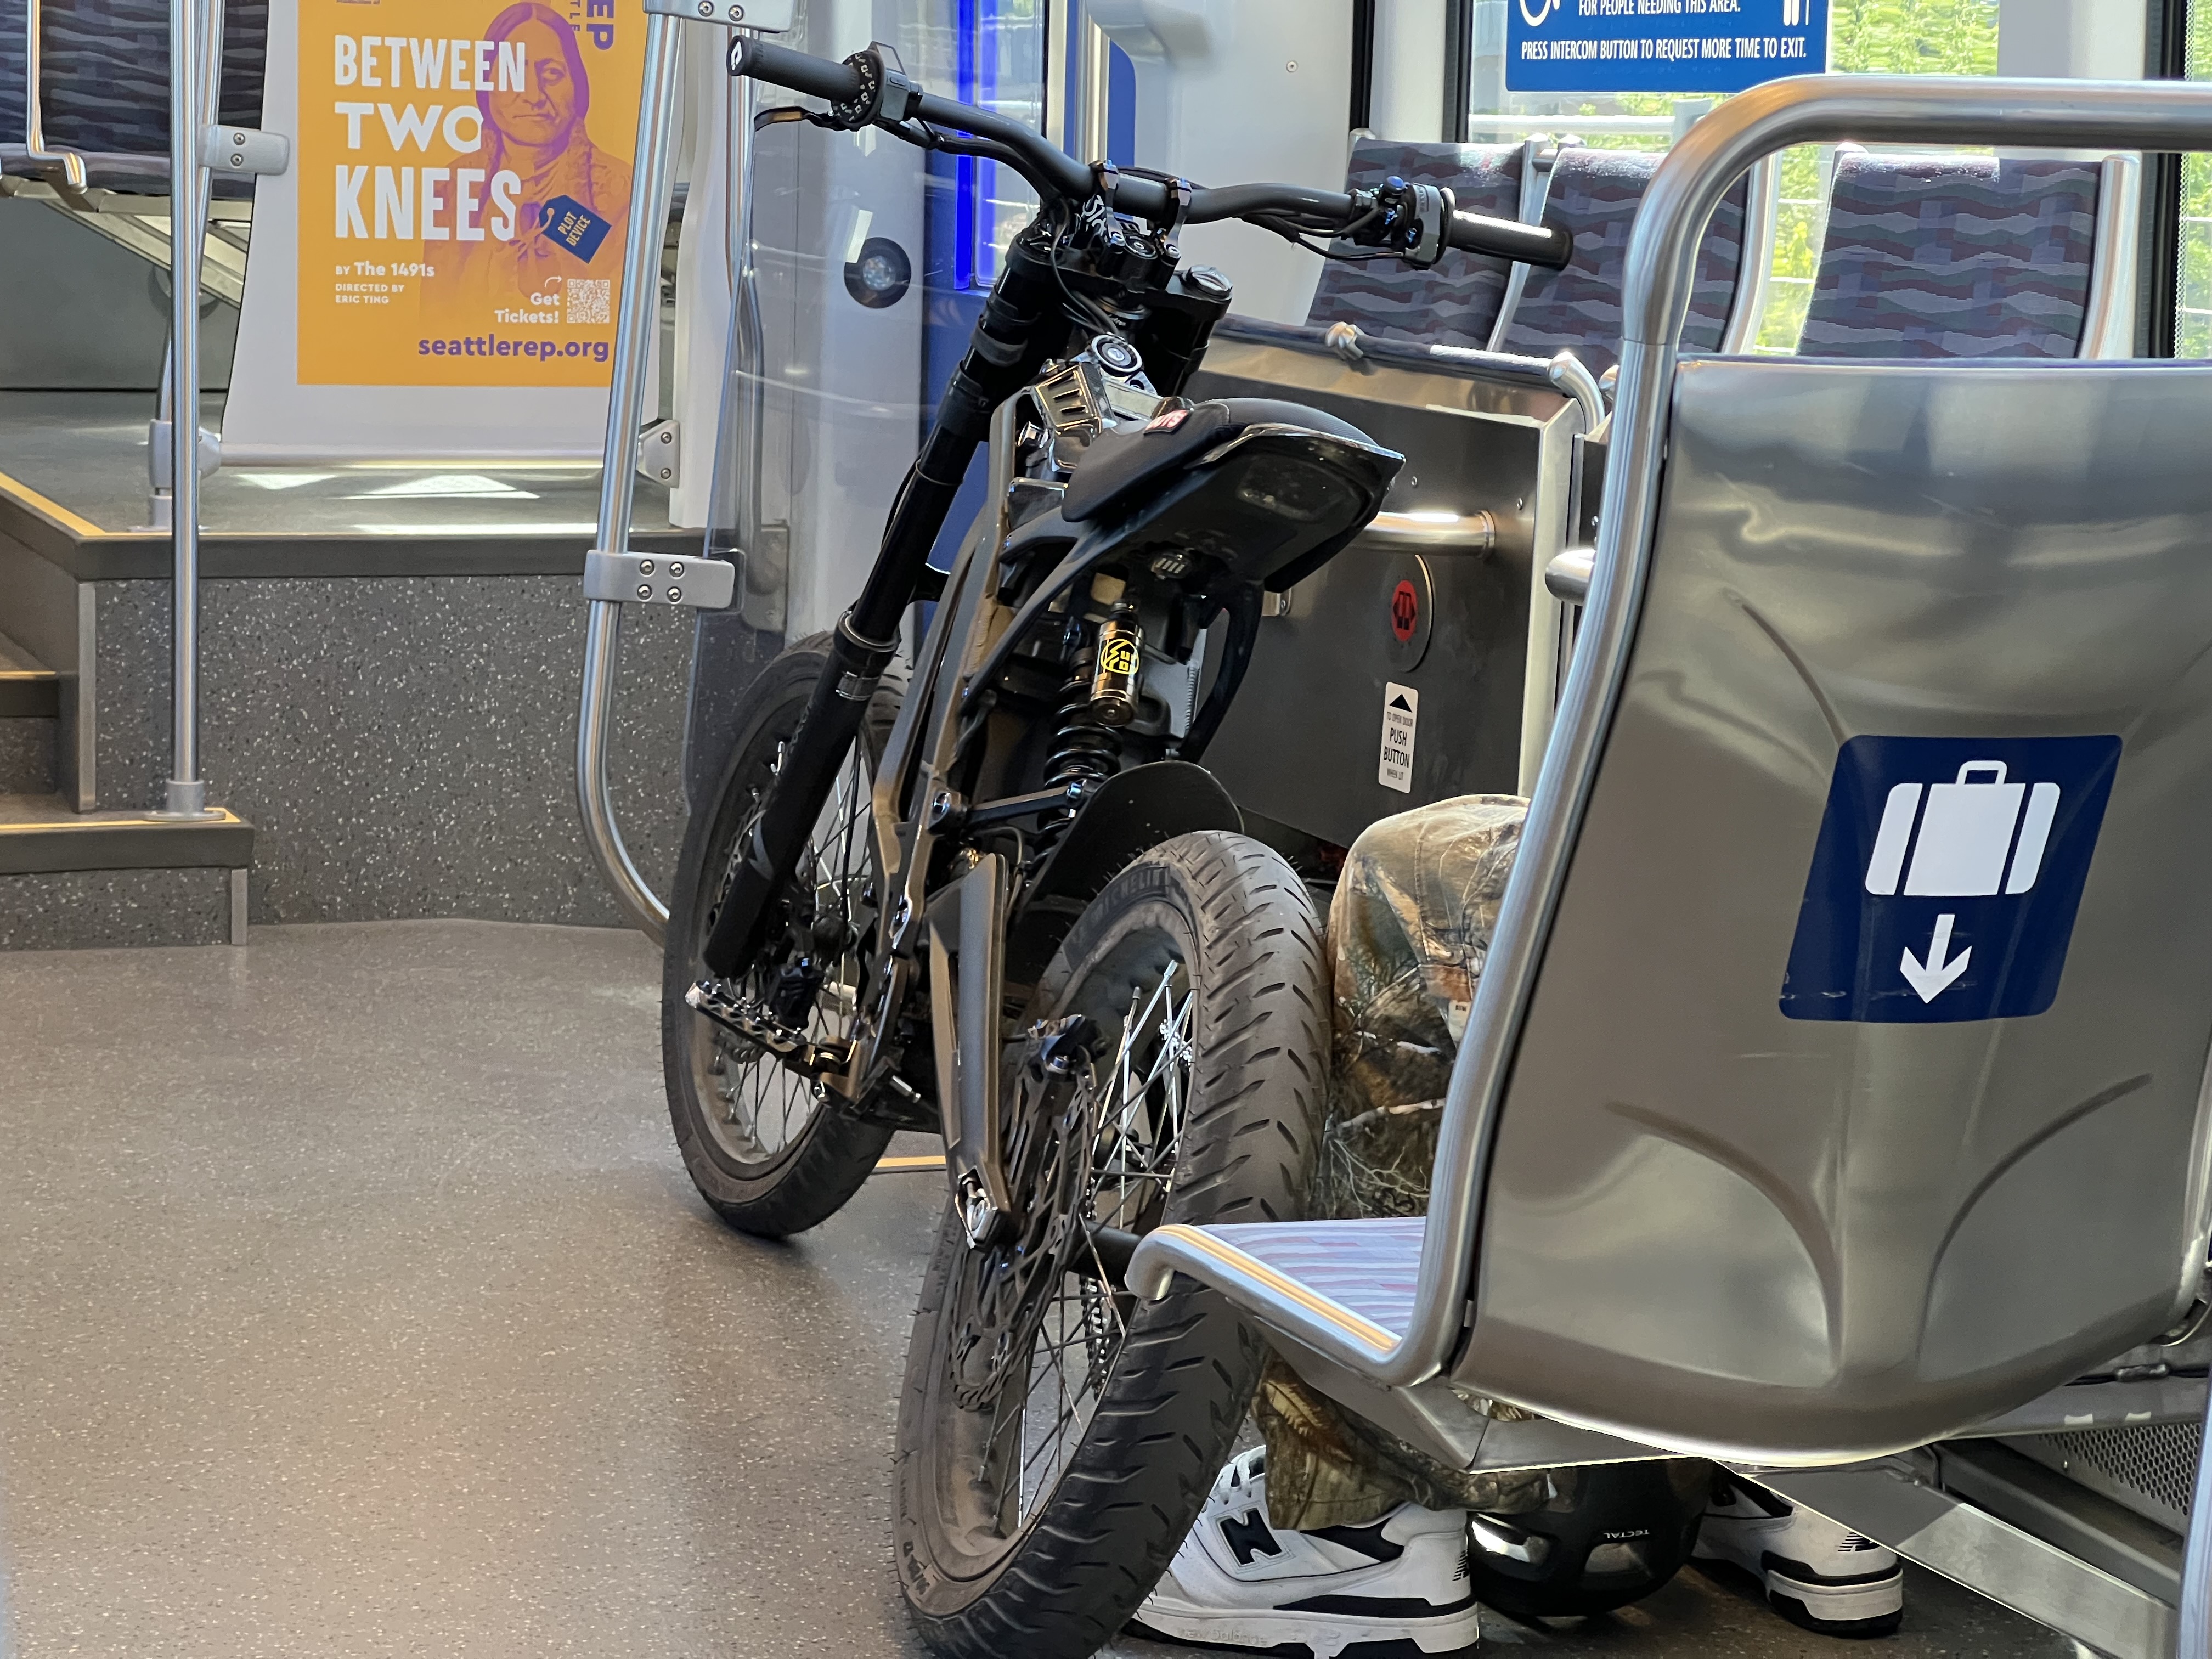
The Horrors of the “Motorcycle E-Bike Things”
Ok, so these beasts are popping up all over the place now. Basically mini-bikes but people think, because they’re electric vs. gas powered they can just magically use them wherever and on whatever trails. These go like ~40 mph (or faster in some cases) and happen to have pedals but are anything *but* a bike or e-assist e-bike. It’s kind of insane, and the disregard, negligence, and recklessness of riding these in pedestrianized areas is tantamount to blazing down the same with a motorbike or worse, a car. The dissonance that some folks find in their mind that this ok to do is beyond me, and when the police all of a sudden find the requests for policing these increasing to unavoidable levels, they’re gonna be cracking down left and right.
But in the meantime, they’re a risk factor in most places they’re meandering about, especially where they’re specifically detailed to NOT meander about. I hate saying that, because I’m a fan of pretty much anything that gets folks out of cars, but the behavior surrounding these is the problem.
I am all for alt travel and massively reducing car dependency. But holy burnt hot dog on a stick these are going to just cause a massive diversion of effort from that when they start killing some folks with em’. Just one giant utter face palm of disgrace.
Ok, but so far on goes life. None of these shits with the dissonance of reason and logic have run into me yet. I made it all the way back to Redmond and after some very light editing, have no posted this glorious log of my trip to Seattle today.
Cheers! May your cycling be rewarding, awesome, and your transit riding and elimination of auto-dependency be as rewarding – or more so – than it has for me! 🤘🏻